はじめに
TextMeshProを使うことでテキスト内に画像を絵文字のように表示できます。
本記事では、テキスト内に画像やアイコンを表示する方法を紹介します。
検証環境
Unity
2022.3.12f1
TextMeshPro
3.0.6
Sprite Assetの作成
テキスト内に表示したい画像を準備します。

Textuer Type を Sprite(2D and UI)に変更します。
Applyボタンを押します。
これで画像の準備OKです。
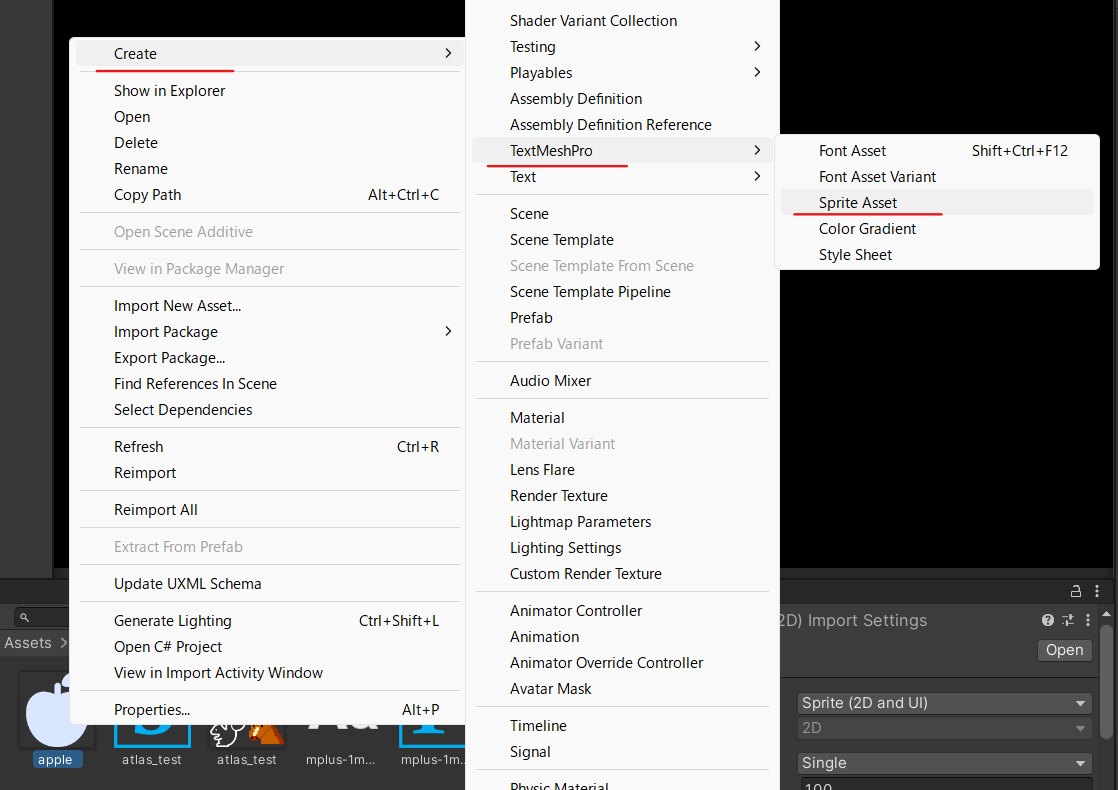
画像を選択した状態で右クリック
Create > TextMeshPro > Sprite Asset を選択します。
Sprite Assetが作成されました。
これをTextMeshProに設定することで、テキスト内に画像を表示できます。
Sprite Assetの設定
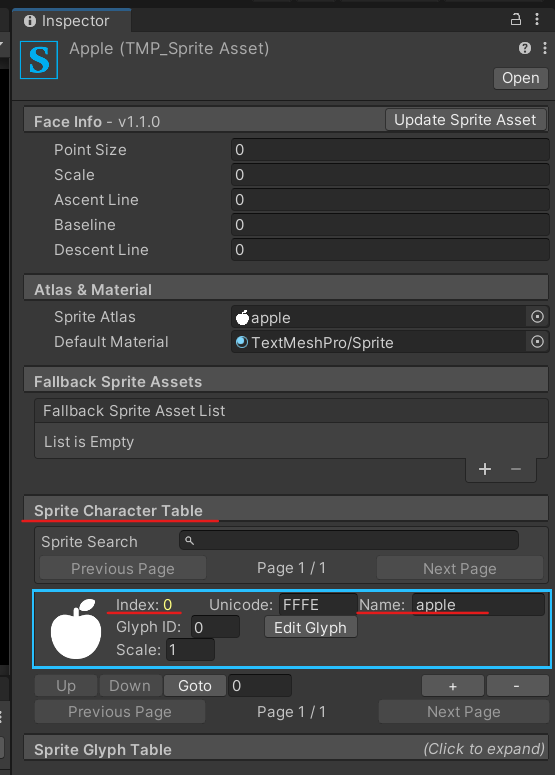
画像を表示する際には Name か Index を指定します。
Sprite Assetの Sprite Character Table から、Name や Index が確認できます。
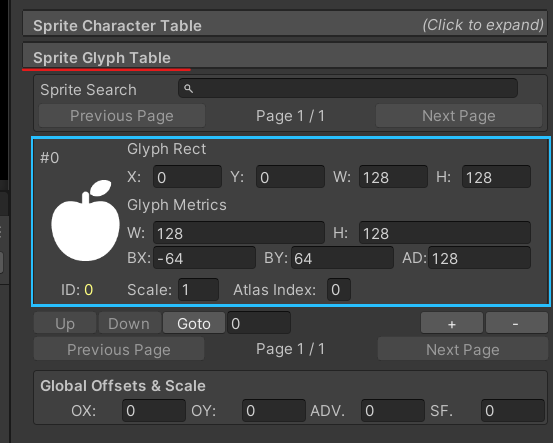
次の項目 Sprite Glyph Table からは表示位置や大きさを設定できます。
TextMeshProの設定
シーンなどに配置したTextMeshProを設定していきます。
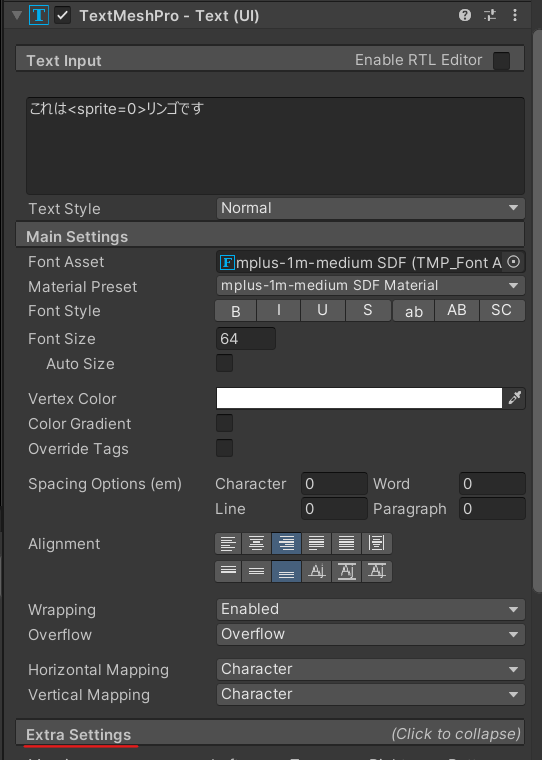

TextMeshProのExtra Settingsを開き
Sprite Assetに先ほど用意したSprite Assetを指定します。
これで表示の準備は完了です。
プロジェクト全体に反映させる
プロジェクト全体のTextMeshProで画像を使用したい場合、
全てのTextMeshProにこの設定を毎回するのは大変なので
デフォルトで使用するSprite Assetを変更しましょう。
Edit > Project Settings を開き
Project Settings > TextMeshPro > Settings を選択します。
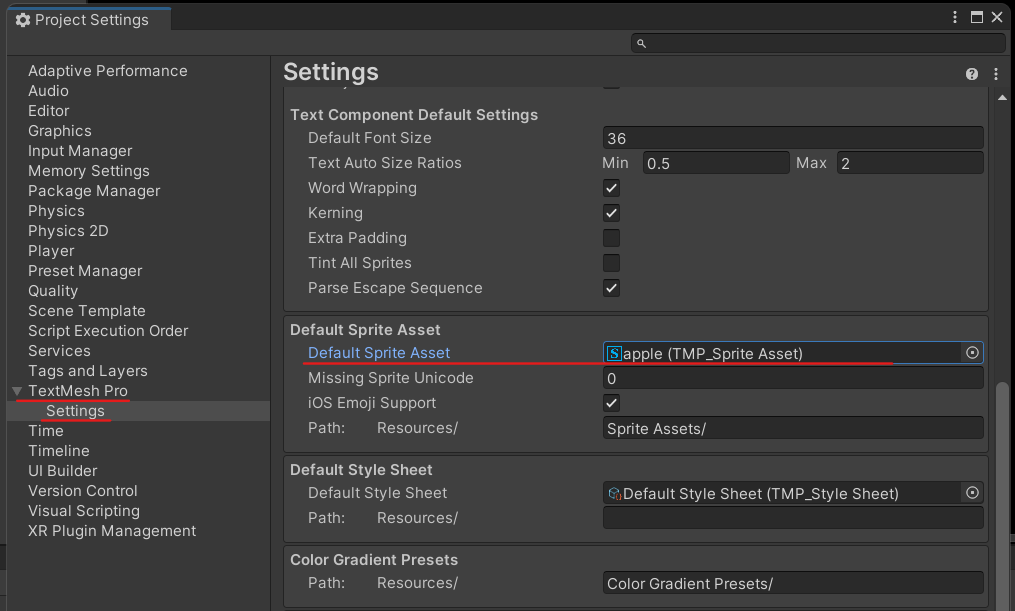
Default Sprite AssetにSprite Assetを指定することで、各TextMeshProの設定が不要となります。

また、Path: Resources/ で指定したフォルダ内にSprite Assetを配置することで複数のSprite Assetを使用することができます。
ここで指定したフォルダはResources以下に配置する必要があります。
動作確認
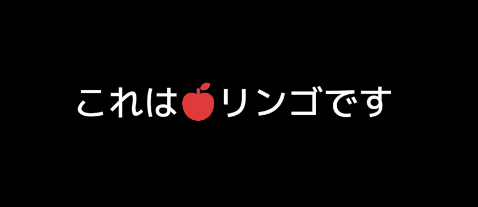
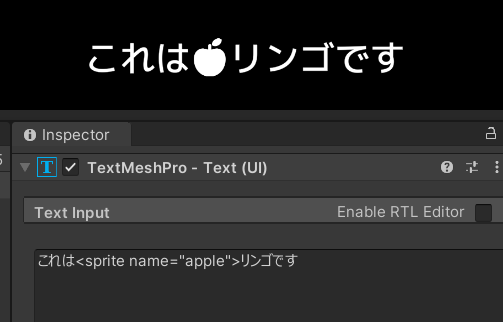
Text InputにNameかIndexを以下のように指定することで表示ができます。
Nameの場合<sprite name=Name>
Indexの場合<sprite=Index>
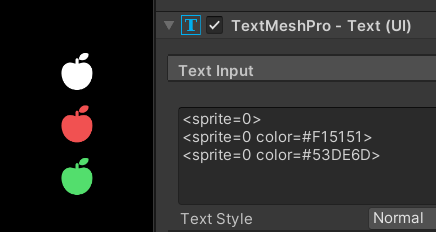
また、タグの中にカラーコードを指定することで色を変更できます。<sprite name=Name color=#FFFFFF>
colorからカラーコードへの変換方法は以下で紹介しています。


コメント